How to Use the Cut List Optimizer
A complete guide to CutGo — a free online cutting optimization calculator for plywood, MDF, chipboard, and melamine panels. Create an optimal cutting plan, set up edgebanding, compare workshop prices, and export a print-ready PDF cut sheet.
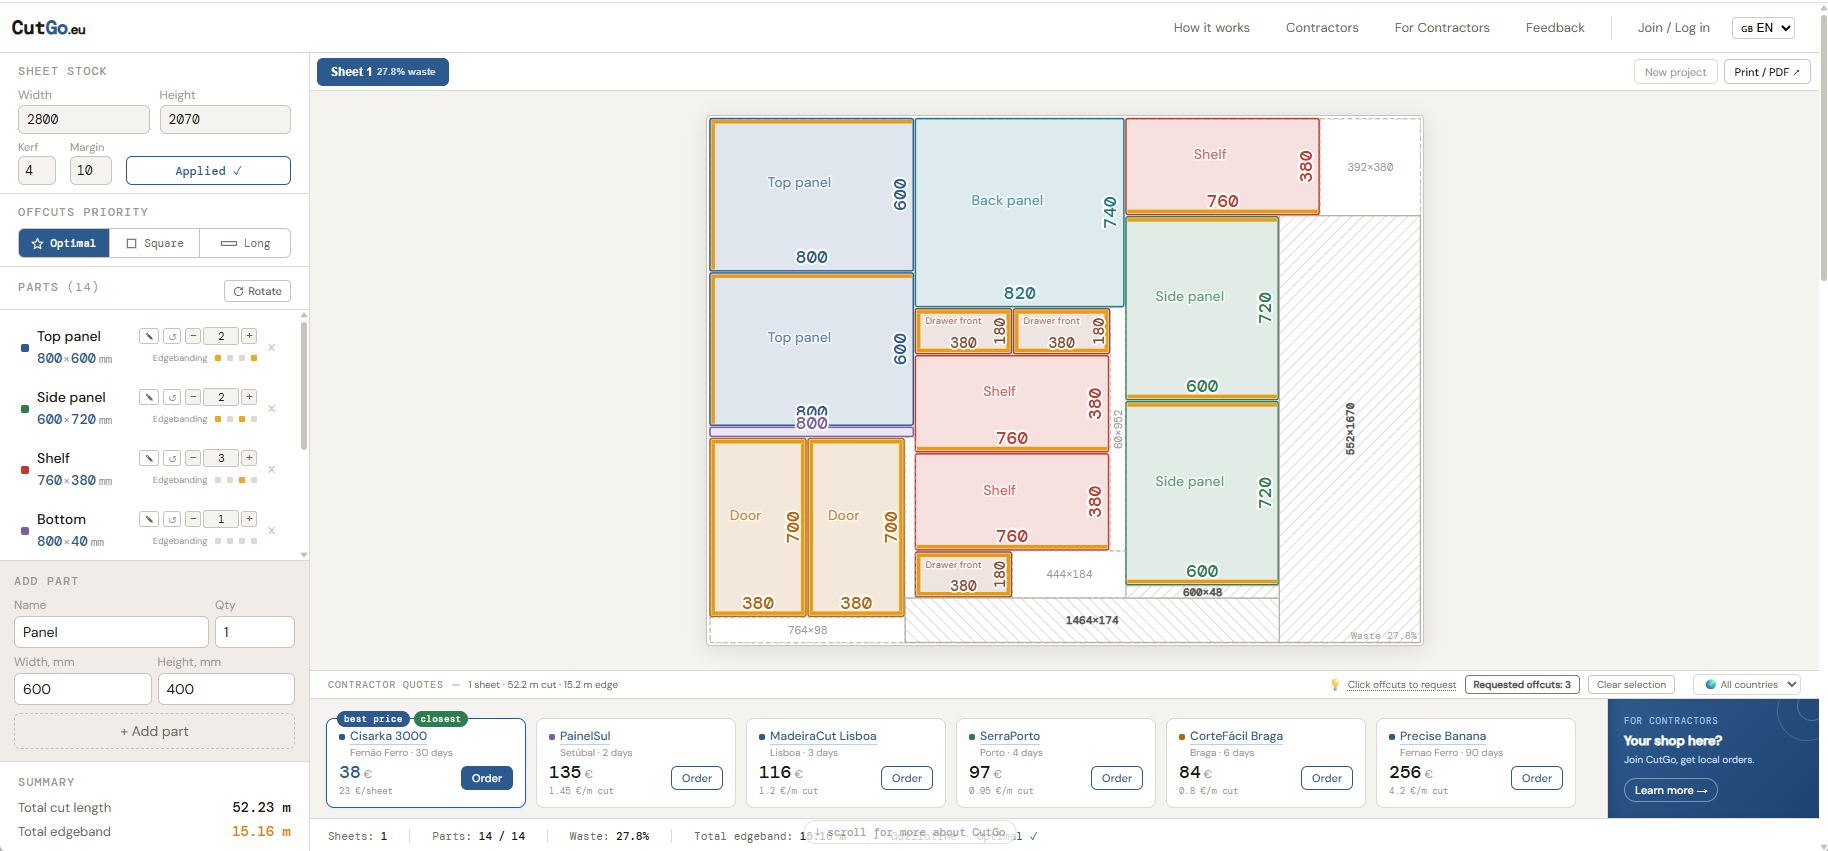
1. Sheet Stock Settings
The Sheet Stock panel defines your base material. The default size is 2800 × 2070 mm — a standard full-format chipboard or MDF panel used in most European panel cutting shops.
- Width / Height — sheet dimensions in mm
- Kerf — saw blade thickness (default 4 mm). The cut list optimizer adds this gap between every cut so the nesting result matches real-world sawing
- Margin — unusable edge strip (default 10 mm) for factory edges or chipping allowance
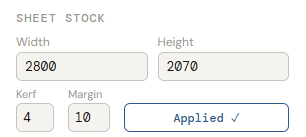
2. Adding Parts to the Cut List
The Add Part form at the bottom of the sidebar is where you build your cut list. Enter the part name (e.g. "Top panel", "Shelf", "Door"), quantity, and dimensions in millimetres.
Press + Add part or hit Enter. The part appears in the parts list and the cutting optimization recalculates immediately.
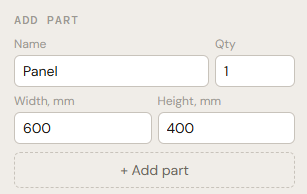
3. Managing the Parts List
The Parts panel shows every part in your cut list. Each row displays the name, dimensions, and a set of inline controls:
- ✎ (pencil) — edit name and dimensions inline; Enter to save, Esc to cancel
- ↺ (rotation) — allow or forbid 90° rotation. When enabled, the optimizer may rotate the part for a tighter nesting fit
- − / + / number — adjust quantity
- × — delete the part from the cut list
Click any part row to highlight it on the cutting map with a blue frame and open its edgebanding panel.
4. Edgebanding Setup
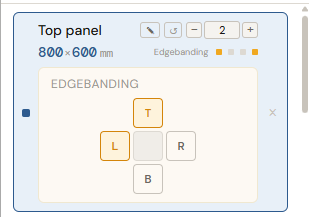
Edgebanding is a key feature of any professional cut list optimizer. In CutGo, each part has 4 coloured dots next to its dimensions — one per edge (Top, Right, Bottom, Left):
- ● Yellow = edgebanding applied on this side
- ● Grey = no edgebanding
Click a part row (or click it on the cutting map) to expand the Edgebanding panel with a clear T / R / B / L grid. Toggle any side on or off. The grid makes it easy to see which edges of a panel will be banded — essential for furniture where visible edges need a finished look.
On the nesting map, edgebanding appears as thin orange strips along part edges. Total edgebanding length is shown in the Summary.
5. Offcuts Priority
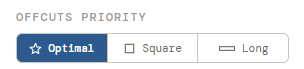
The cutting optimizer offers three nesting strategies that control how leftover material is shaped:
- ☆ Optimal — minimum waste, maximum material yield. Best for most projects
- □ Square — the algorithm favours square-shaped offcuts, useful if you plan to reuse scraps for small parts later
- ═ Long — priority for long rectangular offcuts, ideal for narrow shelves or edgebanding blanks
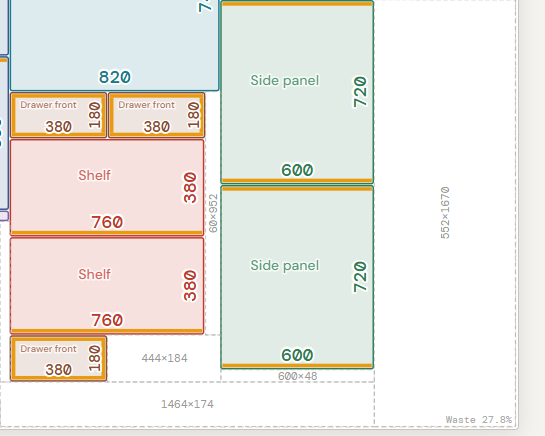
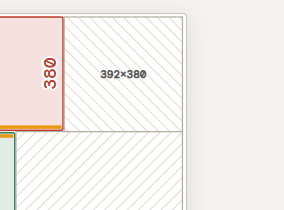
6. Cutting Map & Nesting Result
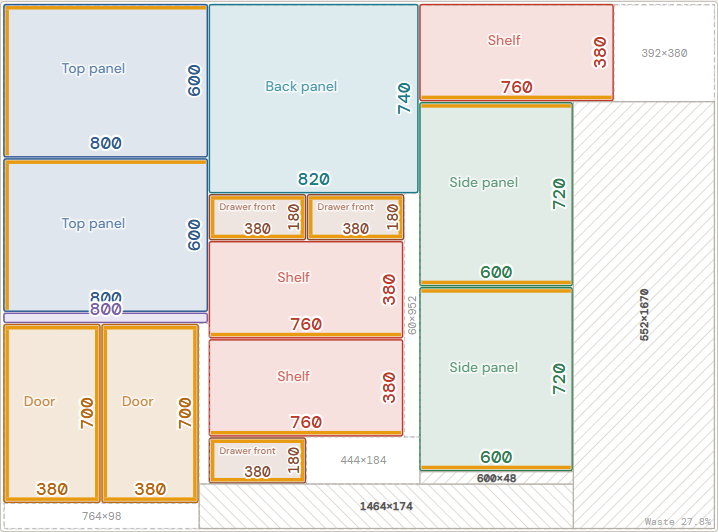
The centre of the screen is the cutting map — the visual result of the nesting optimization. This is where you see exactly how every part from your cut list is placed on the sheet:
- Each part is a coloured rectangle labelled with its name and dimensions (width at the bottom, height on the right)
- Rotated parts are marked with a ↺ icon
- The dashed border is the usable zone (accounting for the margin setting)
- Empty dashed rectangles are offcuts (waste), labelled with dimensions
- Bottom-right corner shows the waste % for this sheet

If your cut list requires multiple sheets, tabs Sheet 1, Sheet 2… appear above the map. Each tab shows its own waste percentage so you can see which sheets are tightly packed and which have room for additional parts.
7. Wanted Offcuts
A unique CutGo feature: click any empty (waste) area on the cutting map to mark it as a wanted offcut. The area gets a cross-hatch pattern.
Why? If you want to keep a specific leftover piece for future projects, mark it here. The wanted offcut will appear in the PDF export and in the order — so the workshop knows to save and pack this piece for you instead of discarding it.

A counter "Requested offcuts: N" appears at the bottom of the map with a one-click clear button.
8. Summary & Status Bar
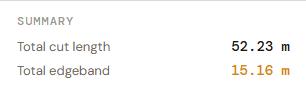
The Summary at the bottom of the sidebar shows key metrics for your cutting plan:
- Total cut length — total metres of saw cuts across all sheets
- Total edgeband — total metres of edgebanding material needed

The status bar at the very bottom of the screen provides a quick overview: number of sheets, parts placed vs. total, overall waste %, total edgebanding, and the current optimization mode (Guillotine / Optimal).
9. Contractor Quotes

Below the cutting map, a horizontal strip shows live contractor quotes. Pricing is calculated automatically from your cutting plan — metres of cut × rate + metres of edgebanding × edge rate.
- best price — best price — cheapest option for your cut list
- closest — closest — nearest workshop (if geolocation is enabled)
- Country filter on the right (flag + dropdown)
- Click a contractor name to see their profile and reviews
- Order button opens the order form for that workshop
10. Placing an Order
Click Order next to any contractor to start the ordering flow:
- Material selection — choose from the workshop's catalogue (filter by type, thickness, brand) or select "own material" if you're supplying your own panels
- Order summary — sheets needed, metres of cut, metres of edgebanding, total cost
- Comment — free-text notes for the workshop
- Submit — the order is sent to the contractor with the full cutting plan attached
11. PDF / Print Export
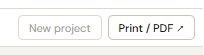
The Print / PDF button in the top-right corner generates a professional cut sheet ready for the workshop floor:
- Summary page (A4 portrait) — complete parts list with sizes, edgebanding, and totals
- Cut maps (A4 landscape) — one per sheet, full-colour SVG layout with part names, dimensions, and offcut labels
- Wanted offcuts — cross-hatched on the map + a separate table listing each requested piece
12. New Project
The New project button (top-right, next to Print / PDF) resets the calculator to demo data. A confirmation dialog prevents accidental clicks. This completely clears your current cut list and stored session so you can start a fresh cutting plan from scratch.
13. Mobile Version
On screens under 768 px a responsive mobile layout loads automatically — no app download needed. The full cutting optimizer works on your phone:
- Sheet parameters — compact strip at the top
- Cutting map — full width, zoomable
- Parts list — below the map with inline add/edit
- Edgebanding & rotation — simplified but fully functional
- Contractor quotes & ordering — same features, adapted layout